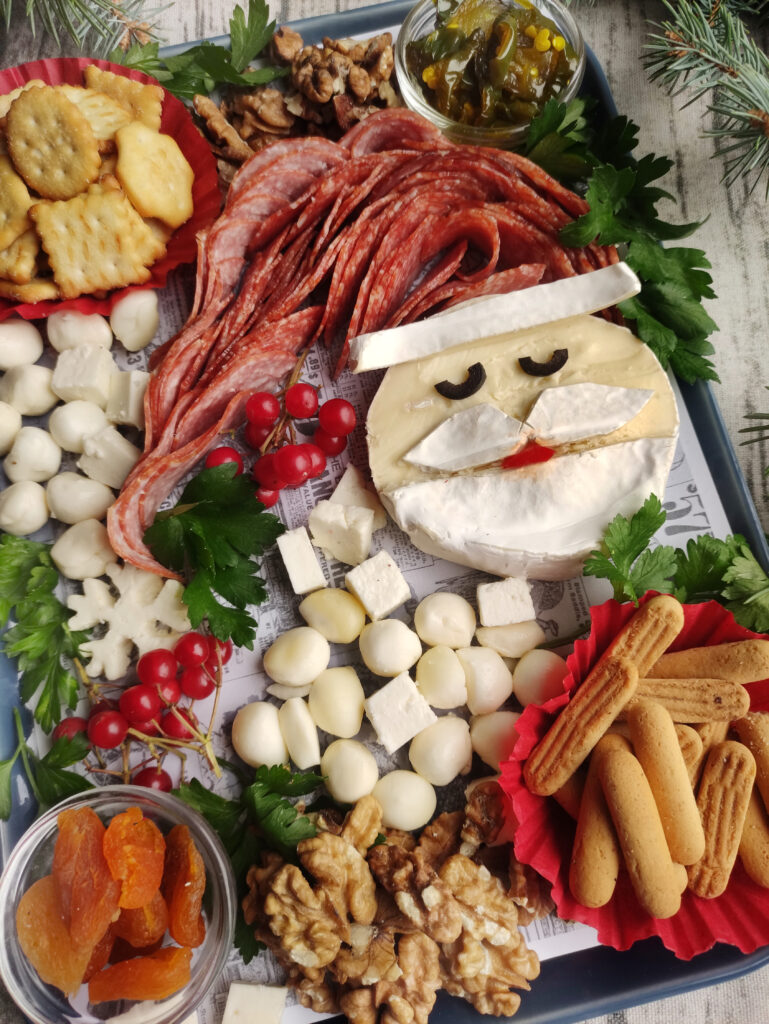
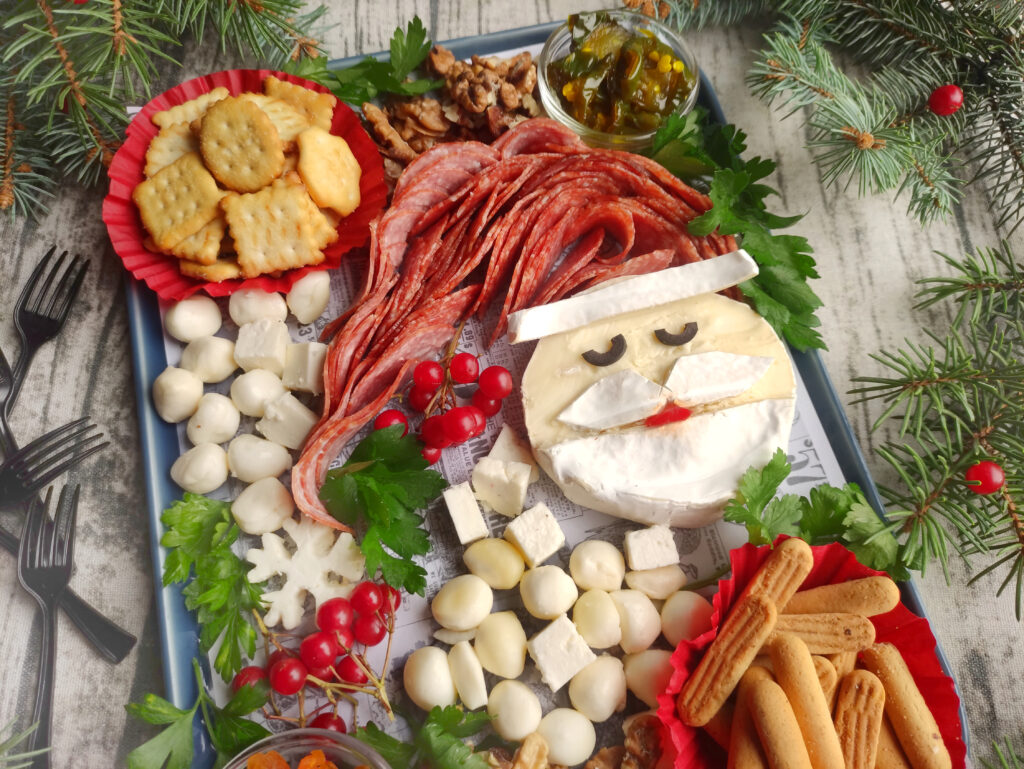
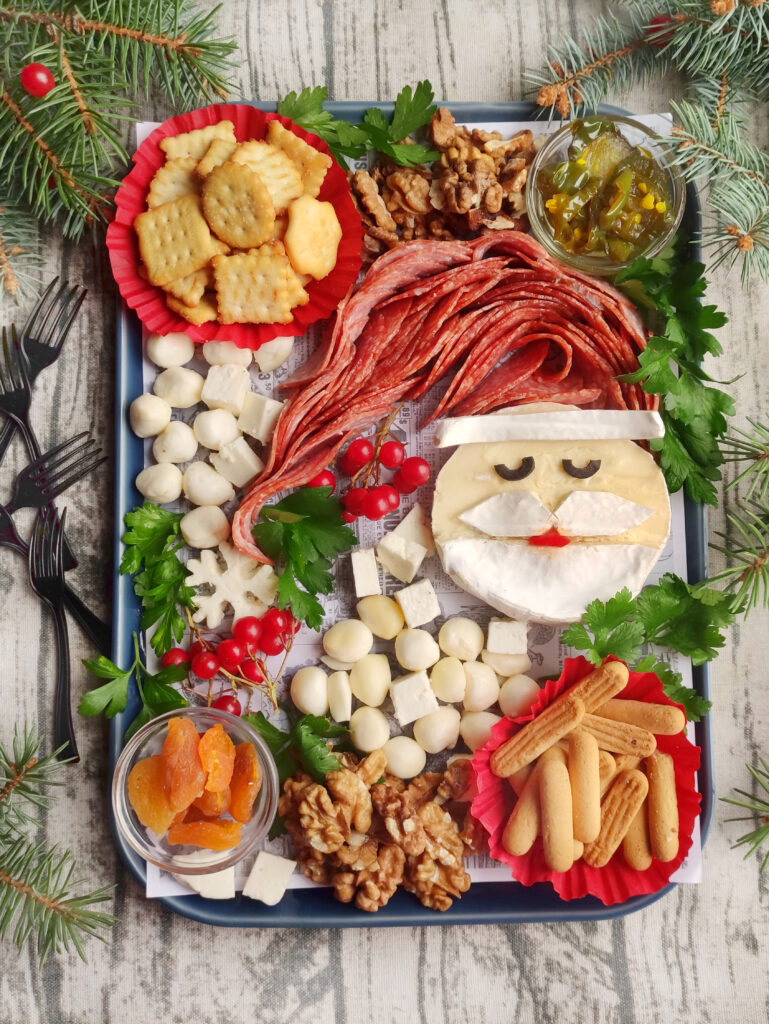
You will have so much fun serving this Santa face charcuterie board which features an assortment of cheeses, meats, and crackers arranged in the iconic shape of Santa Claus. Believe us…this delightful dreamy Santa charcuterie board is a merry culinary centerpiece for any Christmas celebration, with plenty of munchies to snack on throughout your party!
Why We Love Santa Charcuterie Board
The magic begins when you start assembling Santa’s round face and his iconic red hat, using salami to create a bright red accent. The white beard of jolly Santa is represented by brie cheese. Sprigs of rosemary or parsley add a fresh green touch.
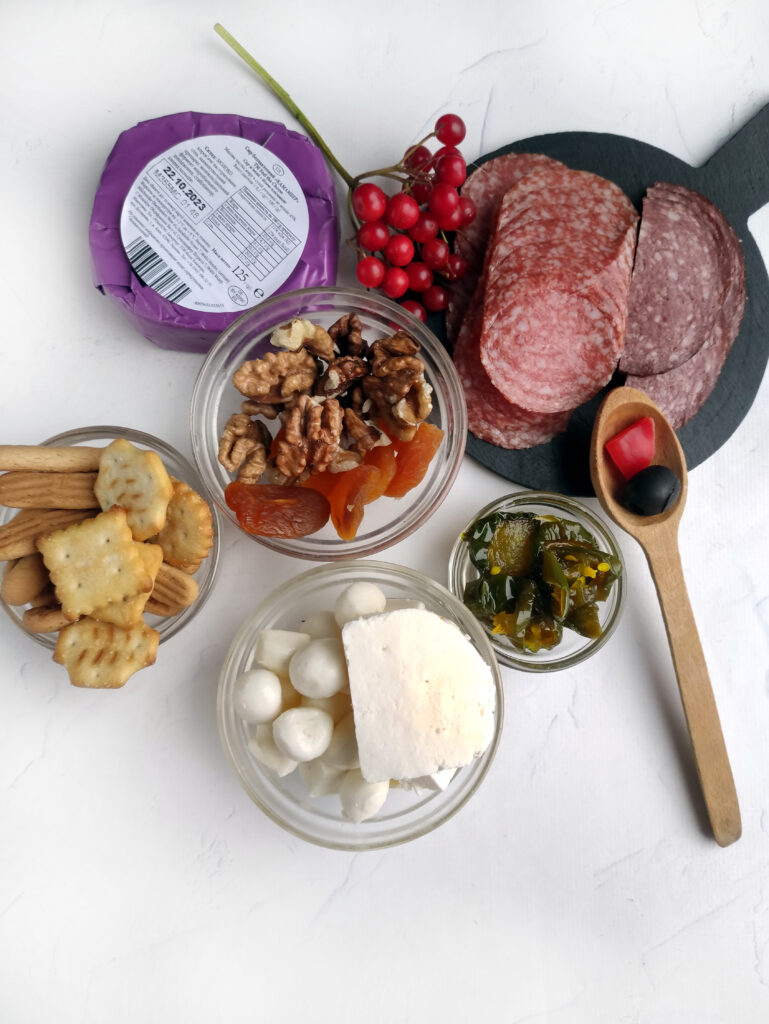
Start by gathering a variety of seasonal ingredients that represent the colors and flavors of the holidays – rich reds, vibrant greens and snowy whites. An assortment of fresh and dried fruits, salami, cheeses, cold cuts, nuts, crackers and breads are the foundation of this Santa dream board.
Ingredients
- 10-12 ounces salami
- 2 ounces of halloumi cheese (or another semi-hard cheese)
- ½ cup mozzarella cheese
- 1 package of brie cheese
- ⅔ cups nuts
- ⅓ cups green olives or cowboy candy
- 1 cup assorted crackers
- ⅓ cup apricots
- A slice of red bell pepper and one black olive (for the mouth and eyes)
- Red berries and herbs for decoration
Recipe Tips for Santa Charcuterie Board
We like to include a variety of cheeses, ranging from soft brie to sharp cheddar, and a mix of cured meats like salami, prosciutto, and pepperoni for a well-balanced flavor profile.
Integrate vibrant fruits in Christmas colors – like red and green grapes, pomegranate seeds, or slices of figs to add pops of color and freshness to the board.
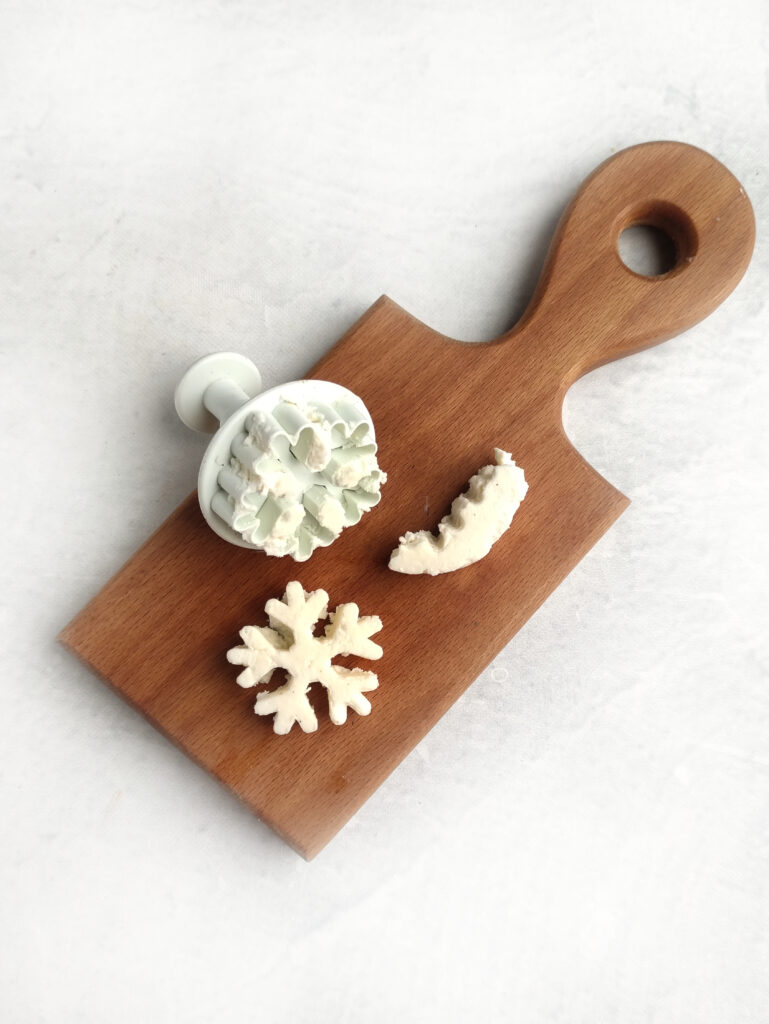
You don’t have to use cookie cutters for decorative cheese pieces, but I will say a few of the snowflakes go a long ways for a clever presentation! Small to medium cookie cutters – likes stars or snowflakes – work best.
Process for Layering the Santa Face Charcuterie Board
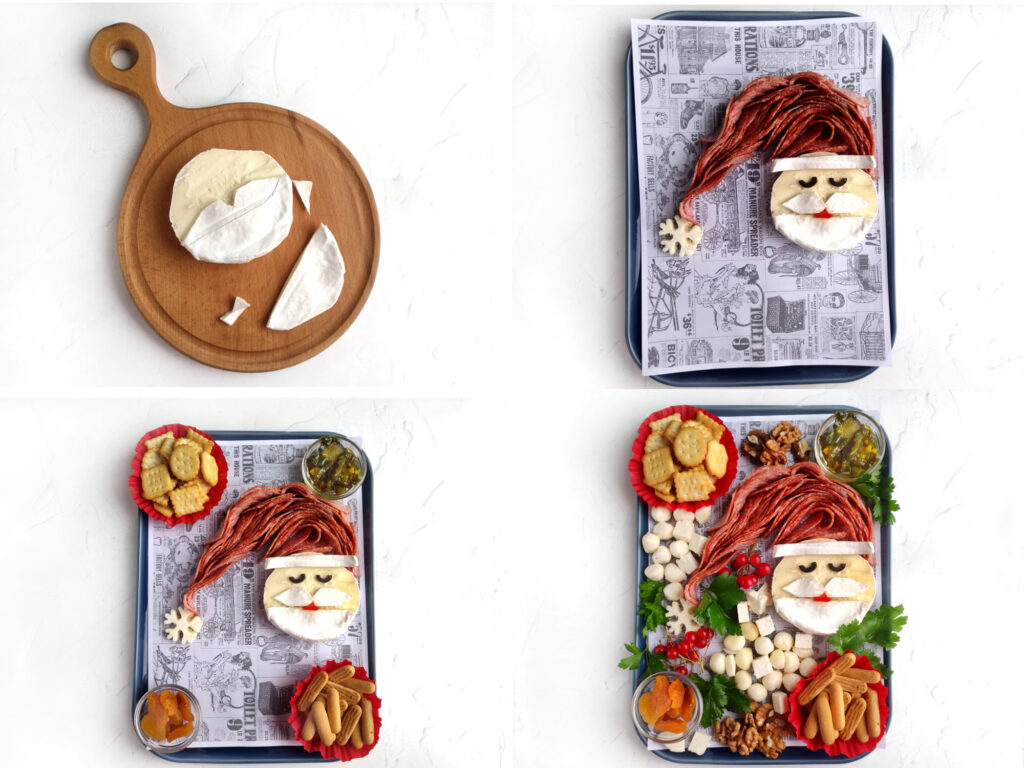
- First, start with the wheel of brie. Slice off the rind and use the rind pieces to shape the mustache, the beard, and the rim of the hat, as pictured below. Add two halves of a sliced olive for the eyes and a sliver of red bell pepper for the mouth.
- Next, add the hat, which is made of slices of meat. You will want to cut the meat slices shorter and then create rounded pieces just above Santa’s head – to create a bit of a rounded dome. Then, continue adding on with longer slices of meat to give a long wavy hat effect.
- Place either a mozzarella ball of cheese or a piece of halloumi cheese cut with a snowflake cookie cutter as the bottom end of the hat. Place one container or one bundle of crackers, nuts, or fruit in each corner.
- Continue filling in around the board, leaving as little white space as possible, tucking in fresh herbs and fruit last.
Substitutions and Variations for Santa Face Charcuterie Board
- Experiment with different cheeses, such as blue cheese, Gouda, or goat cheese, to provide diverse flavor profiles.
- Instead of traditional cured meats, consider using some meats you don’t incorprorate into your everyday use – such as smoked salmon.
- Opt for unconventional spreads like fig and olive tapenade, truffle-infused honey, or spicy pepper jelly to elevate the flavor profile. One of our favorite spicy pepper jelly versions is candied jalapeño jelly. It is the absolute best! My friend sells it in her shop, and I always stock up ahead of the holidays. You can also use the jalapeño pepper jelly or a cranberry pepper jelly to bring a little red to your Santa charcuterie board.
Storage, Advance Prep, and Reheating Instructions
- To store a Santa-themed charcuterie board, carefully cover it with plastic wrap or aluminum foil, ensuring that the wrapping does not disturb the arrangement of the cheeses, meats, and garnishes. Refrigerate the board promptly to preserve the freshness of the ingredients, and when ready to serve again, allow it to come to room temperature for about 20-30 minutes to enhance the flavors before presenting this festive and delicious centerpiece at your holiday gathering.
- Personally, I do not like to store the crackers and such on the platter. I just add those crunchy items on just before serving. For advanced preparation of a Santa-themed charcuterie board, you can pre-cut some of the cheeses and cured meats to save time on the day of the event. Arrange non-perishable garnishes and snacks, such as crackers, nuts, or dried fruits, in separate containers for easy placement later. Additionally, you can prepare any specialty spreads or dips a day ahead and keep them stored in the fridge.
- Since a Santa-themed charcuterie board typically features cold items like cheeses and cured meats, reheating is not typically a part of the process. However, for any accompanying warm elements such as baked appetizers or dips, store them separately and follow their specific reheating instructions.
Magical Santa Charcuterie Board
Ingredients
- 12 oz Salami
- 2 oz Halloumi cheese
- ½ cup Mozzarella balls
- 8 oz Brie cheese
- ⅔ cup Nuts Assorted or your favorite type
- ⅓ cup Green olives or candied jalapeños
- 1 cup Crackers Assorted
- ⅓ cup Apricots or other fruit of choice
- 1 cup Grapes Red or green, or both
- 1 Red bell pepper one small sliver
- 1 Black olive only one
- Fresh herbs
Instructions
- Using a medium cookie cutter, snowflake, cut out a few snowflakes with the halloumi cheese and then cut the rest of the brick into cubes.
- Remove the package of brie cheese. Slice the top section about 1/3 of the circumference. cut out small triangles to make Santa's mustache.
- Cover a tray or serving board with a napkin. Arrange the brie cheese. Add the halves of the olive circles – the eyes and mouth from the bell peppers. Cut a strip of brie from the loose part of the brie cheese to form a cap.
- Cut the salami slices in half. Lay out the salami in whimsical curls, as if the slices were leaning on each other.
- Continue laying out the salami cap. Place the snowflake pom-pom on the end of the cap.
- Place crackers in the corners of the tray. In other corners, place small containers of cowboy candy (or olives), apricots, and any other dippers you are using.
- Arrange the cheeses, nuts, herbs, and berries, taking care to arrange the components compactly neatly. Fill as much of the white space as you can.
- Serve immediately.
Nutrition
More Holiday Recipes and Fun
Host a Neighborhood Cookies with Santa Visit
Christmas Desserts for the Classroom
Decorating with Plants on the Christmas Table
Christmas Dress Up Days – Themes and Ideas
Black and White Christmas Tour
Free McDonald’s Christmas Printable
Dirty Santa Ideas for the Classroom
Tips for Seeing Garvan Gardens Christmas Display
A Trip to Guess and Company Christmas Warehouse in Des Arc
Inspirational Christmas Displays from Guess and Company
Blue Christmas Decorations Ideas
Modern Blue and Red Christmas Decorations

Leave a Reply